Room - Fusion
Articles in section
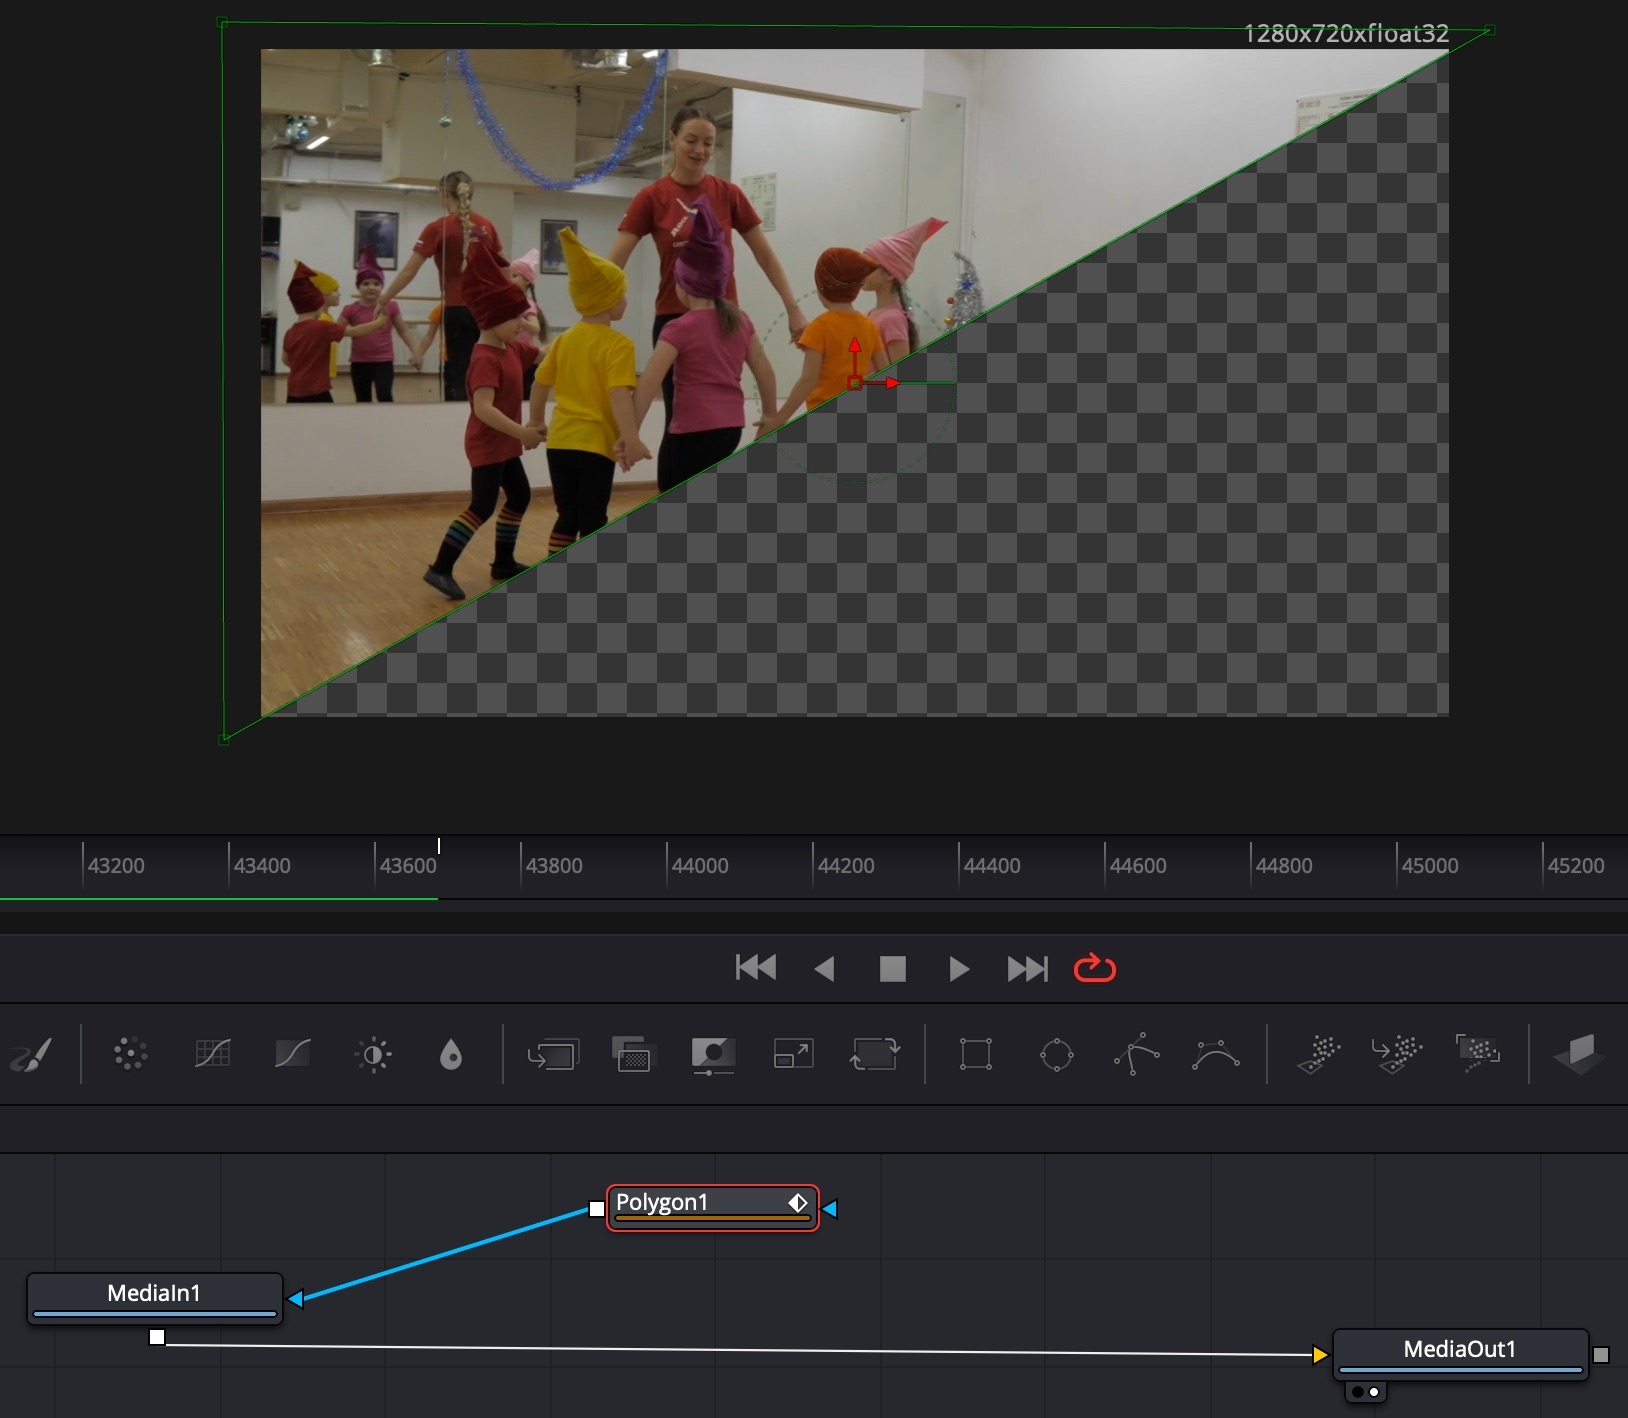
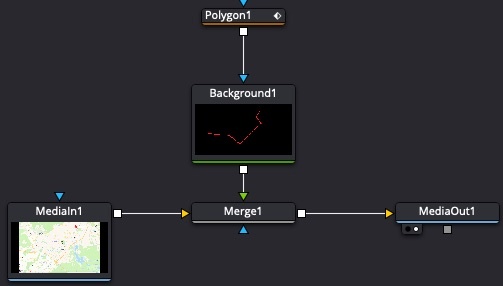
Diagonal masks
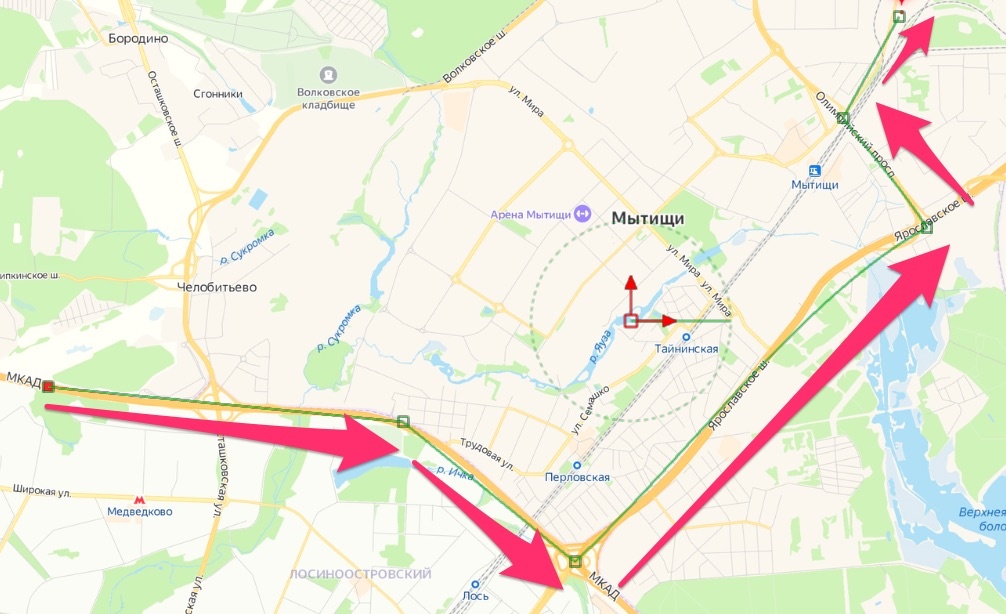
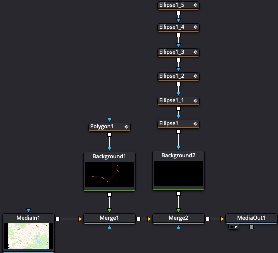
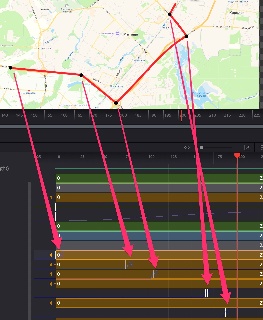
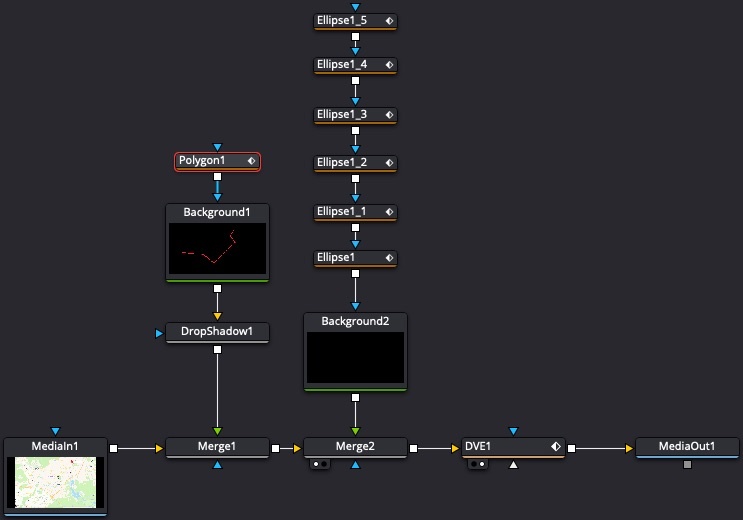
Make animated travel maps
Fusion Settings
Menu Fusion → Turn OFF Show Toolbar;
Menu Fusion → Fusion Settings…
- General tab: Proxy → Standard change to 4:1;
- Flow tab: Source Tile Pictures=ON will show video thumbnails in node graph instead of plain rectangles;
- Flow tab: Arrange to Connected=ON helps organize connected nodes;
- Flow tab: Show grid=OFF lessens visual garbage on Node graph;
- Flow tab: Build direction=Vertical to streamline node creation with software such as The Foundry Nuke or SideFX Houdini;
- Frame format tab: Lock depths=16bit float per channel(64 bit) will significantly enhance inner image processing quality;
- User interface tab: Zoom Cmd=OFF, Pan Cmd=ON - this will enable zoom with simple mouse wheel like in many other editors.
Note
Reboot of DaVinci Resolve needed after settings saved.
Hotkeys in Node Graph
SHIFT+SPACE - search&create node by name menu
CTRL+T - switch inputs (in merge node switch background & foreground)
Connecting output of one node to the output of another node will automatically create a Merge node;
Tips
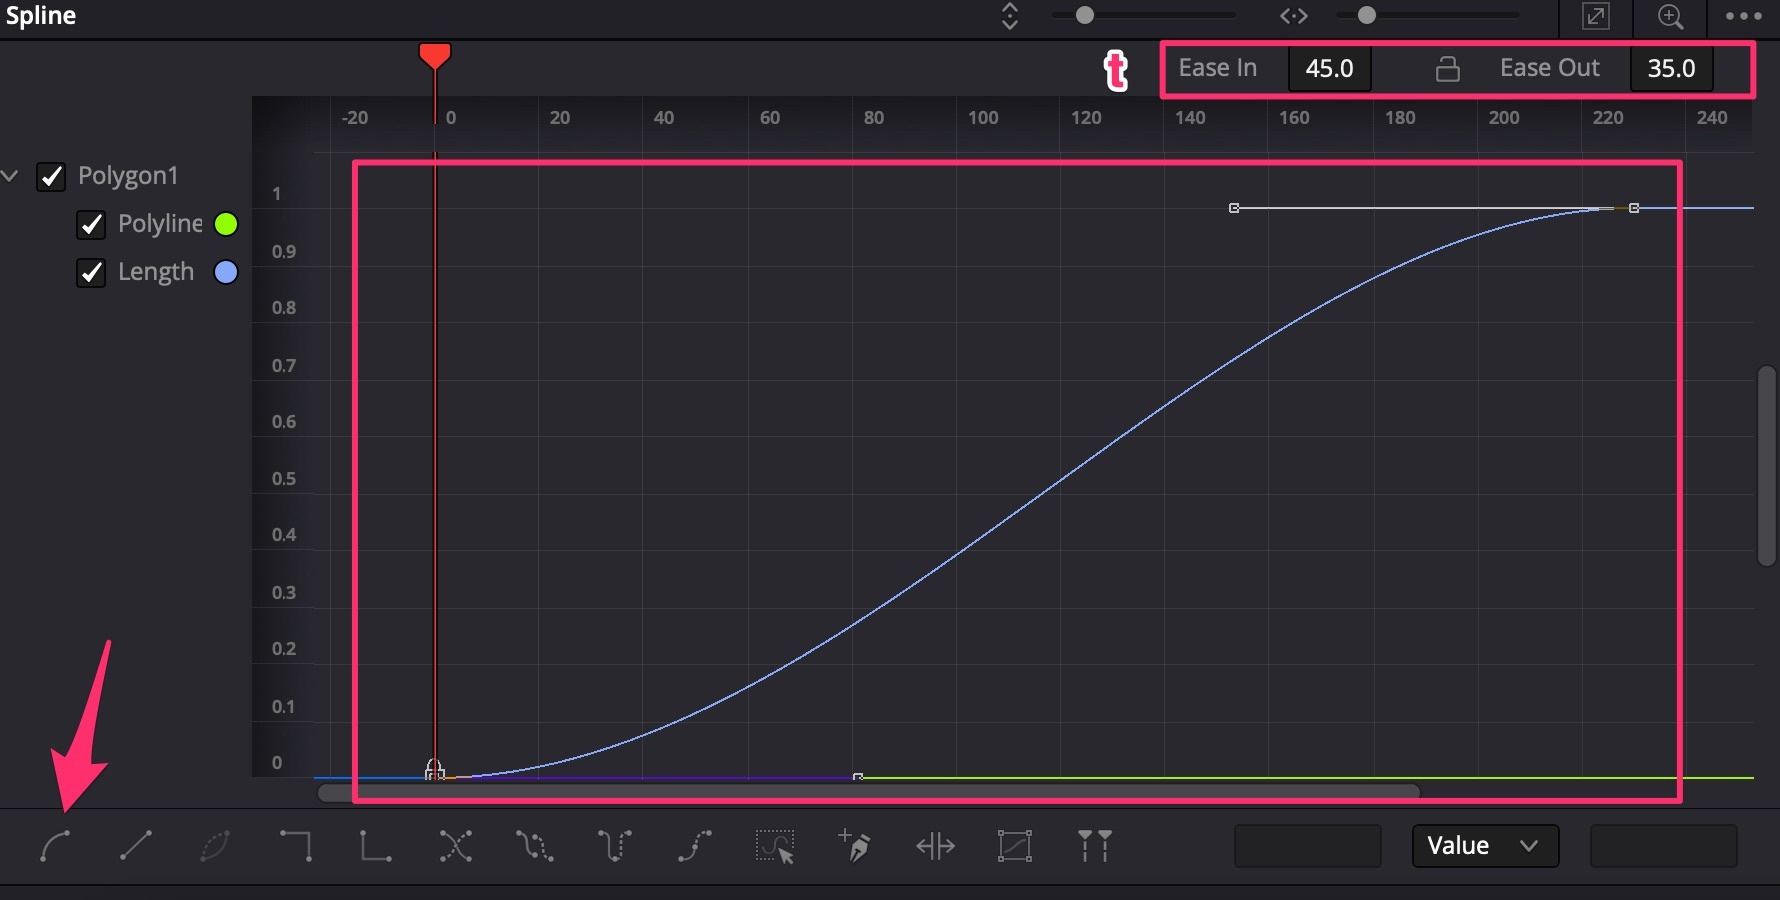
Editing Color Curves color correction and other nodes splines in Spline Editor
- Put a Color Curves node;
- Open Spline Editor. In its’ menu …, choose Show only Selected Tool, then click Zoom to Fit button (diagonal arrows in a square).
Copy perspective view to camera view
- Connect camera node to Merge node;
- While Merge node is selected in graph, in perspective windows rotate the view, the Mouse Right-Click → Camera → Copy PoV To → Choose the connected camera.
Reactor Plugin Manager
Link: https://www.steakunderwater.com/wesuckless/viewtopic.php?f=32&t=3067
- Drag & Drop the Reactor LUA script into Fusion nodes field, install;
- Check out Reactor in Workspace → Scripts → Reactor → Open Reactor…
To remove plugins from Reactor, use Remove button. Do not un-tick them.
Handy plugins
- xGlow - advanced version of Glow node;
- FastExpoGlow - gives a golden light;
- HeatDistortion - hot air effect.