Travel Maps
External Link: https://www.youtube.com/watch?v=Vb42fYP6FBU
- Choose a large map picture, throw it in DaVinci Resolve Timeline;
- Make the still image video 10 seconds in length;
- Open the map image video in Fusion Room;
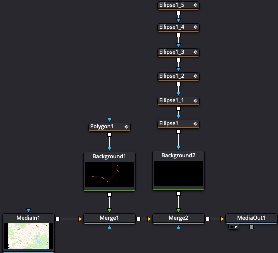
- Add a Background node and Merge it with the MediaIn node;
- Add a Polygon node and connect it to Background node;
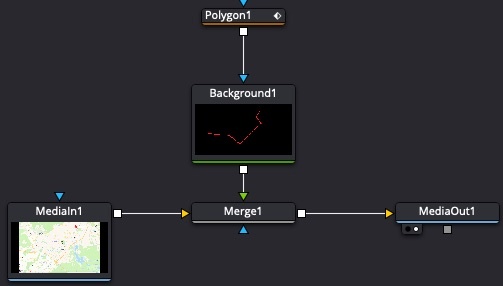
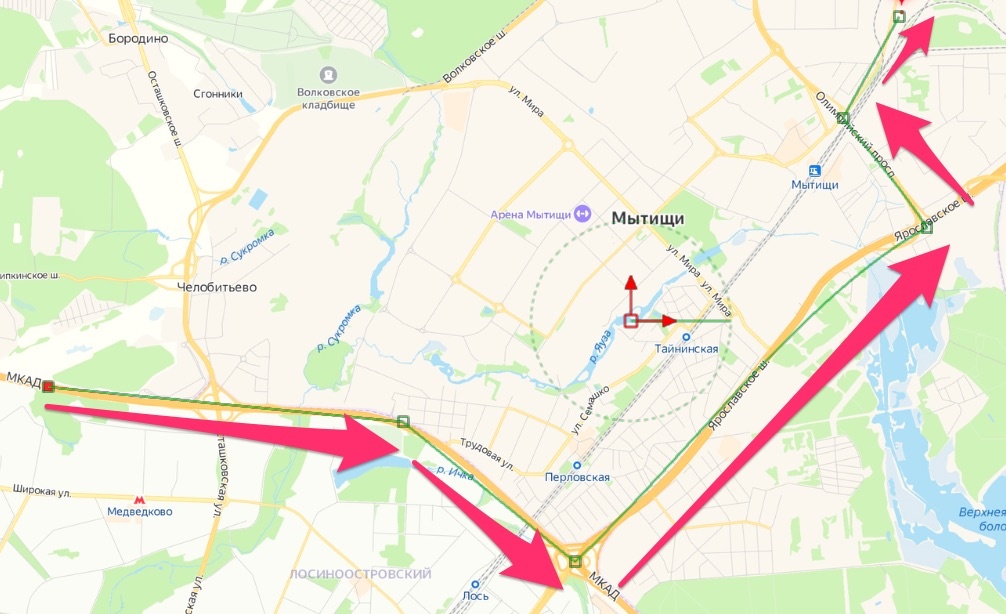
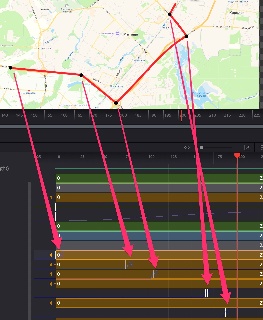
Choose the Polygon node, then in the Viewer draw line segments from point A to B;
In Polygon node → Controls → Border Width = 0.006 add border width to see the line. Choose Polygon → Controls → Border Style to make line ends round or square;
Change Background node Background → Color to make the line colored appropriately;
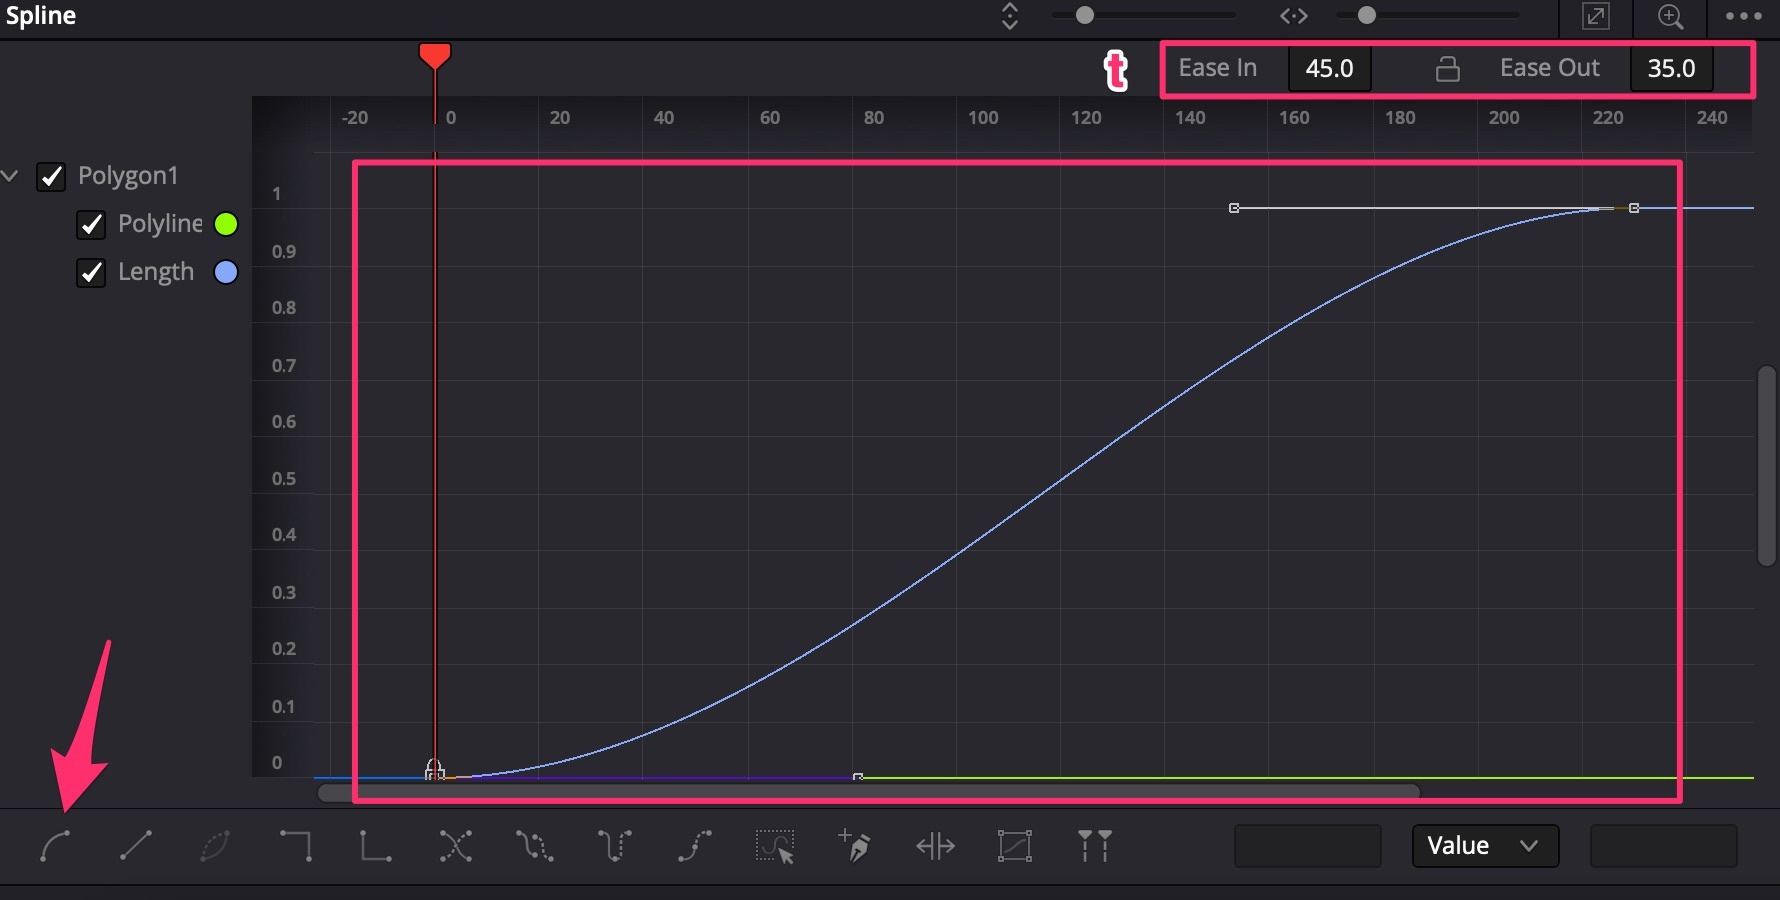
Animate the Polygon node → Controls → Length from 0 and frame 0 to 1.0 at last frame;
In Spline Editor choose both keyframes, make them smooth (hotkey S). Then use hotkey T to select Ease In = 45 and Ease Out = 35;
Create map points: add a new Background node, Merge it with the previous Merge node;
Add an Ellipse node, drag the border of the ellipse to make it a small point;
Animate Ellipse → Controls → Border Width from small negative number to 0 to make the point pop out when travel line starts from it;
Go to Spline Editor, choose the Ellipse keyframes and press S to make them smooth;
Ctrl+C copy the Ellipse, then Ctrl+V paste it to make other points for the travel line. Move them to appropriate positions;
Use the Keyframes editor to move the keyframes of ellipse copies in the appropriate frames of time.
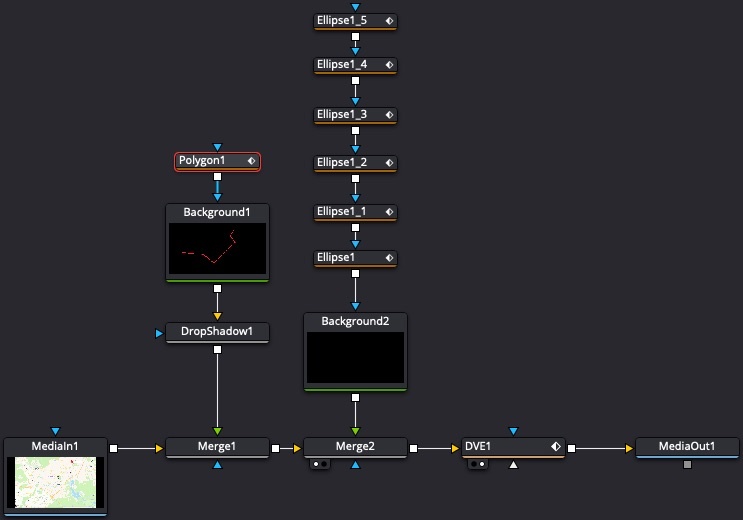
Make Pseudo-3D Effects
- Add Drop Shadow node, connect it after the Polygon + Background nodes, before the Merge node;
- Reduce Drop Shadow → Controls → Blur parameter, reduce the Drop Shadow → Controls → Drop Distance parameter to make the shadow closer;
- Add the DVE node just before MediaOut node;
- Adjust DVE → Controls → Z Move = 0.3. Adjust DVE → Controls → Rotation → X and Y to make cool 3D-like effect;
- Make the Viewer into Dual-View, and put result of DVE in one viewer and Merge node before it in second Viewer windows;
- Adjust DVE → Controls → Pivot → X slightly to see the large X in the viewers. Grab the X and move it to the first point of the line;
- Animate the Pivot by dragging it to points following the travel line. The use the Spline editor to choose all keyframes and make the animation smooth (S);
- Go to Polygon node and edit Polygon → Settings → Motion Blur = ON, Quality = 9.