Node Structures
Color Correction Structure
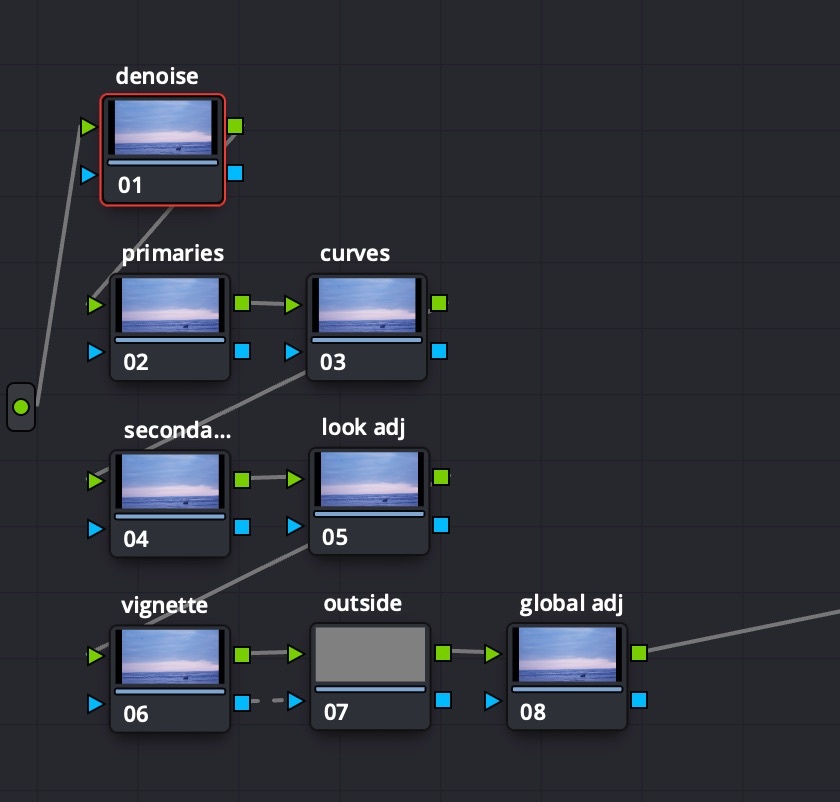
Color Correction structure contents:
- global denoise to reach pristine look for selection
- node for primaries
- node for curves
- basic secondaries + additional secondaries nodes
- vignette node, then Add Node → Outside Node, then finally the global look
Color Grading Structure
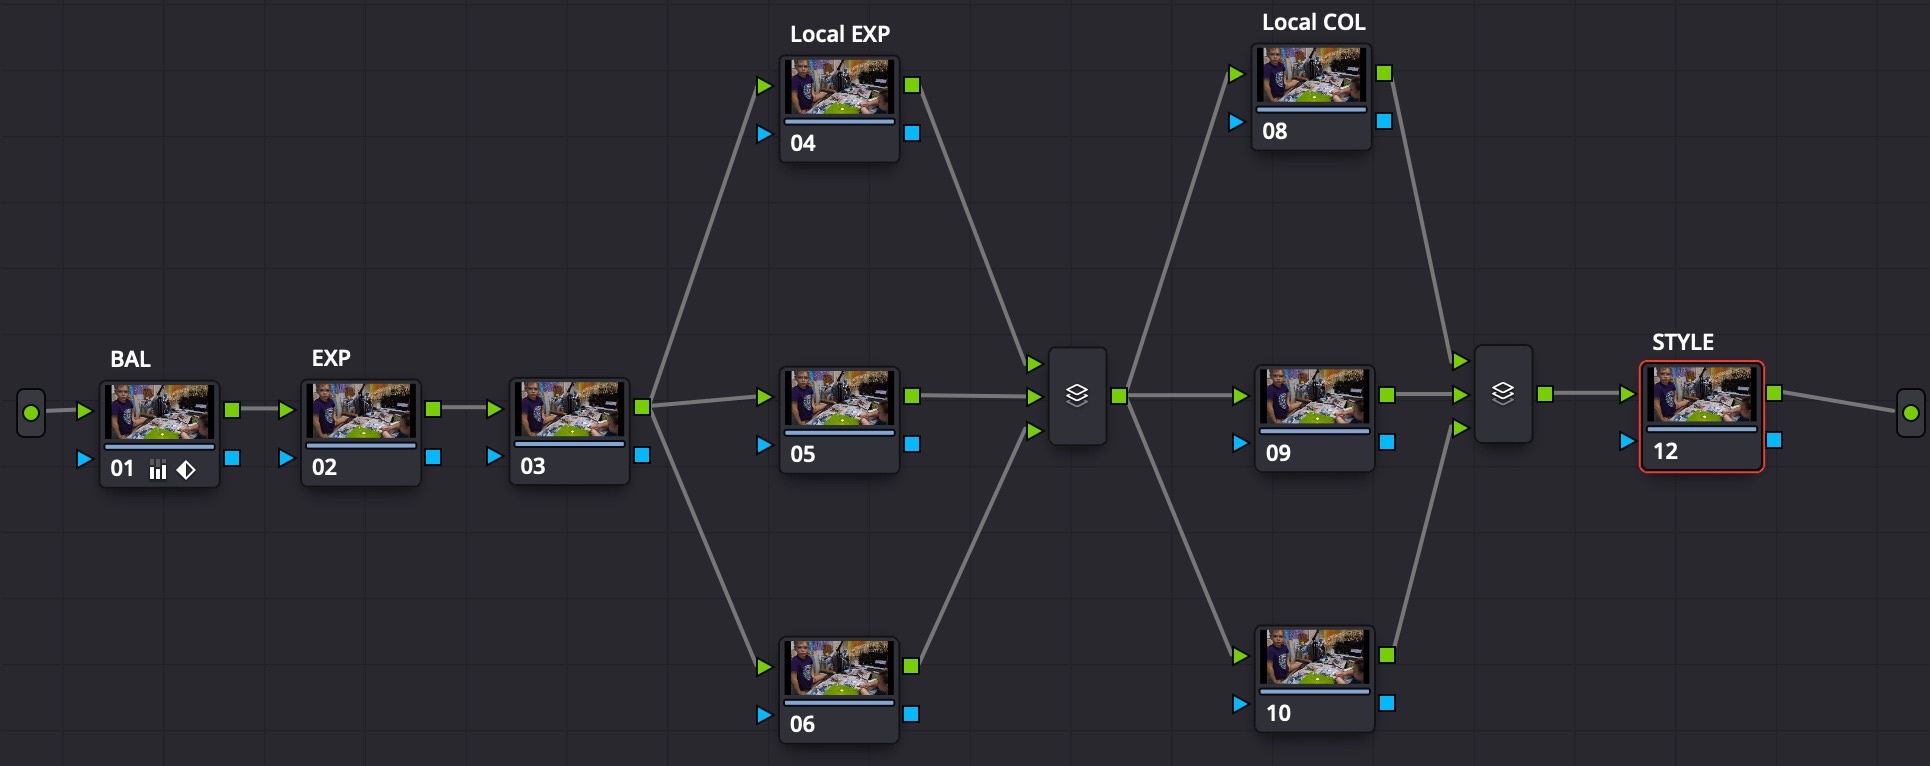 Color Grading structure contents:
- 3 global corrector nodes: color balance, global exposition, misc global node (noise reduction?)
- 3+ local exposition corrector nodes: use masks for areas and add light, like lighting up the face
- Parallel mixer with 3 inputs
- 3+ local color corrector nodes: use masks for areas and change saturation, like de-saturating items with bright colors, which may drag unwanted attention
- Parallel mixer with 3 inputs
- 1 corrector node with a combination of LUTs to produce a special look (color grading for drama / atmosphere / mood goes here)
Parallel Nodes
Changes in parallel nodes are made to the image with the same intersection, as if the nodes were in sequence (Serial type). The difference is that all parallel nodes read data from one initial node, while in serial sequence the next node reads data from previous node with all corrections applied on the previous step.
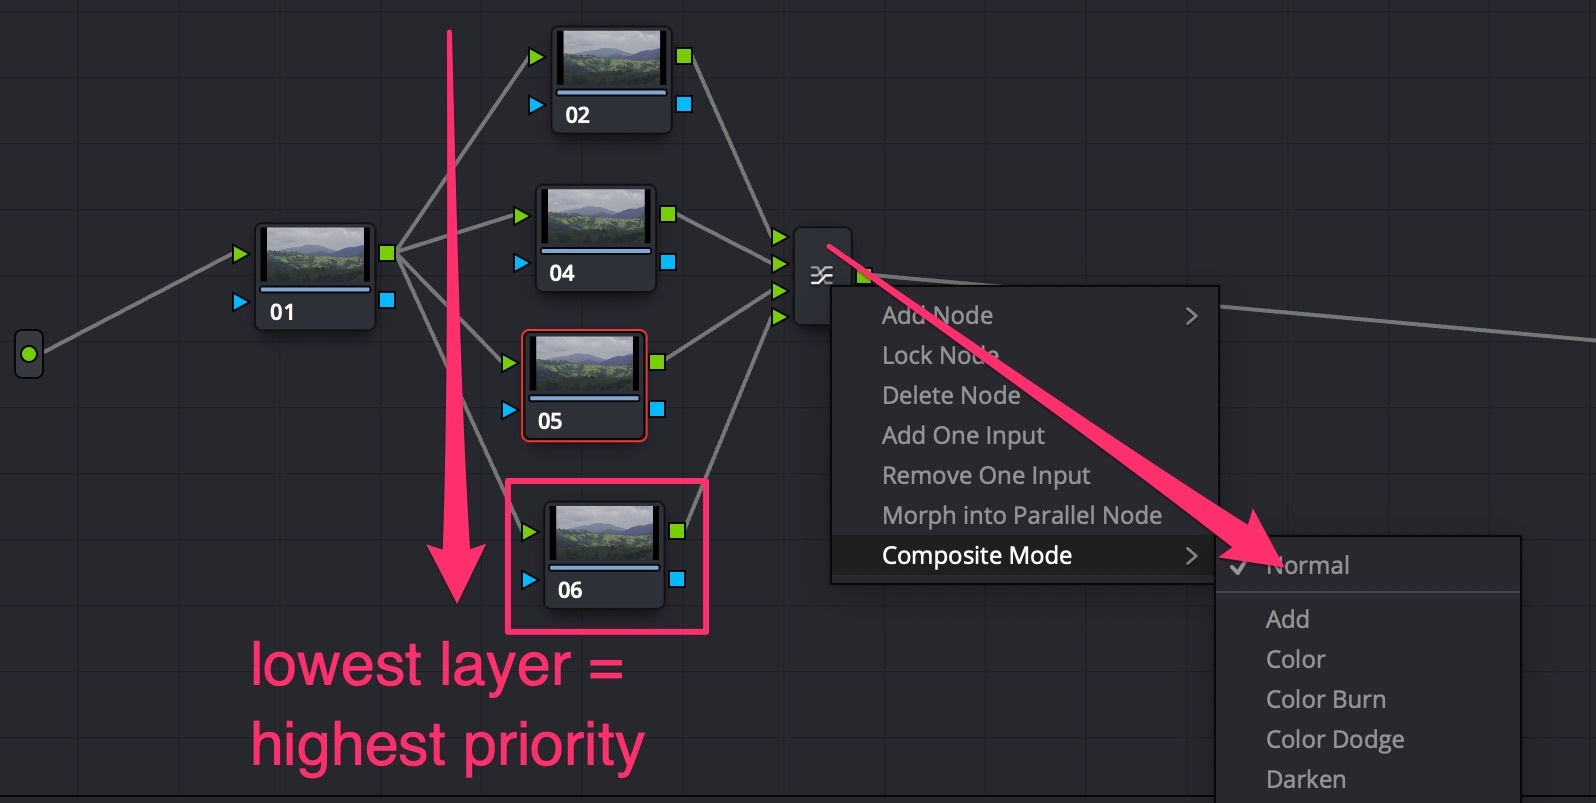
Node Layers
Layers are parallel nodes, but work in opposite direction: lowest layer has the highest precedence. Layers can be composited using connecting node settings.
Node Sequence
Nodes sequence matters
- Create 2 nodes: in the first darken image using a LIFT wheel. In the second node make it red with the LIFT wheel and raise Saturation to 100%;
- Make a second version with nodes in reverse sequence;
- See the difference: if darken is first, then more areas become red using the second node than vice-versa.
Tip
Instruments sequence also matters: in the Color Wheels section, Lift/Gamma/Gain wheels are applied BEFORE the general Offset wheel.
Contrast sequence matters
When you use a node to make stronger contrast on a footage, you basically stretch the image info between Dark & Light boundaries. If you create a second node after the “contrast creation” one, you will be changing the resulting stretched image data, and the changes will be more subtle and soft.